
Border settings for selected photos
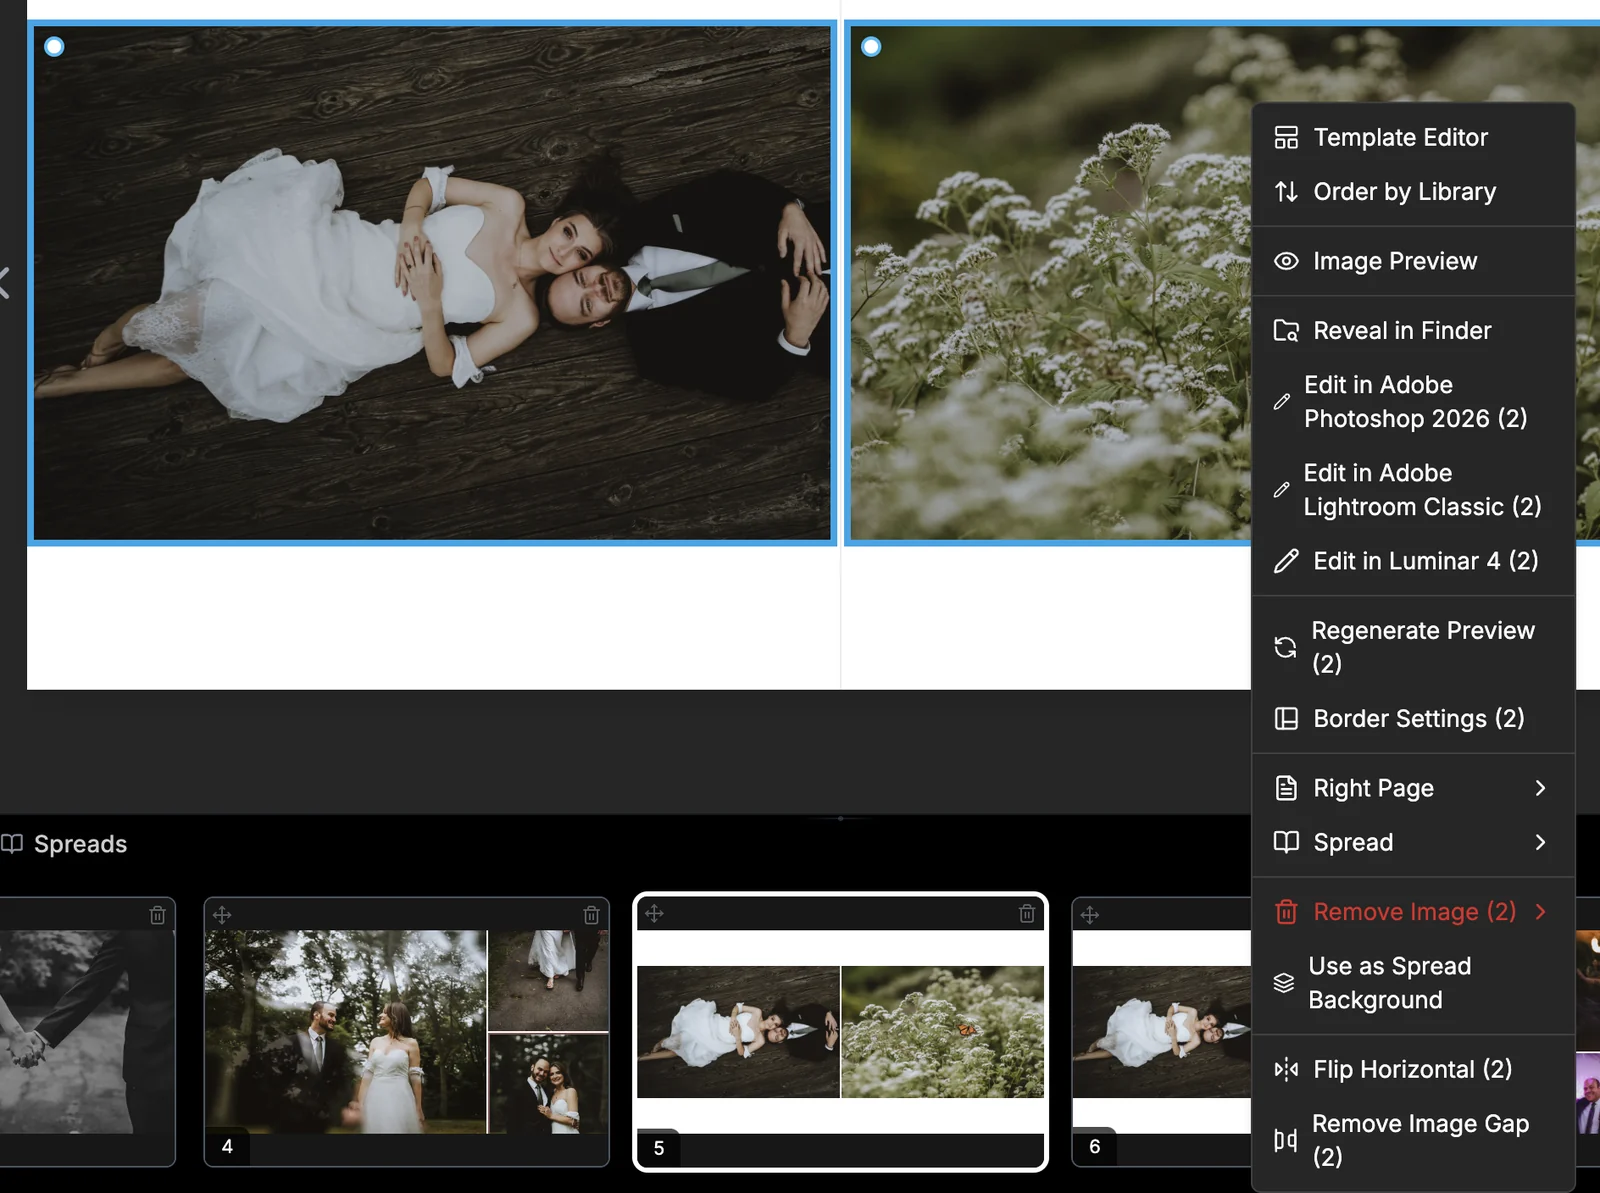
Right-click a photo and choose Border Settings to give it its own border. Select several photos first (Cmd or Ctrl + click) and the menu says how many - Border Settings (2) - so one change sets the same custom border on all of them. Leave Custom border off and they follow the project border setting; a size of 0 removes the border.
More in Backgrounds, borders & gaps
See all 12Add a background image to a spread40:18Set background opacity40:31Apply a background to every spread40:41Change the project background color46:27Give one spread its own background colorGuideAdd borders around your photos46:46Set the gap between photos46:00Remove the gap at the book gutter43:07Fill an empty placeholder with a color or gradient0:47Pick a color with the eyedropper1:40Hide the book gutter indicator45:43